
As part of the rack I got the other day, I spent quite a while thinking of the best way to organise all my timekeeping stuff.
19″ racks are pretty cool, it’s a standardised way to mount equipment, and available more or less the world over. The only hitch is that the screws on the front contain a trap for people that aren’t paying attention. Here’s the catch, the hole spacing isn’t uniform.
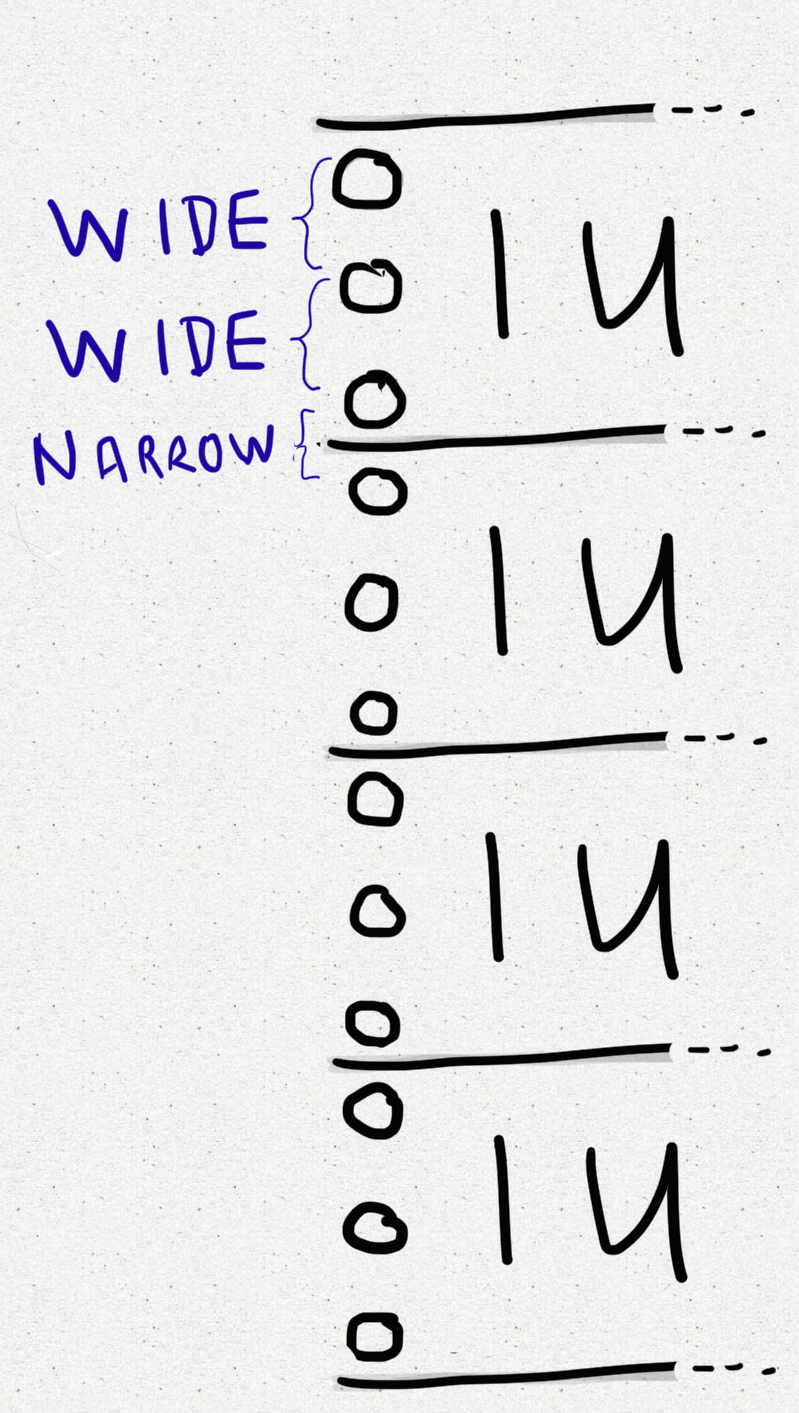
There’s two sets of pitches for the holes, a wide 15.875mm (0.625″) and a narrow 12.7mm (0.5″). Each 1U has 3 holes separated by wide gaps, and the boundary between two units has narrow spacing. This makes sense, as it means a heavy 1U server is held up by screws closer to the edges (and hence more secure) than they’d otherwise be with uniform spacing.
The only downside is that you have to be very careful when you install the cage nuts & equipment, otherwise you’ll get halfway down the rack and realise the holes don’t line up.
Let’s take a simple example where we’re mounting cage nuts to suit a bunch of 1U servers with holes on the top and bottom. Here’s the possible outcomes:
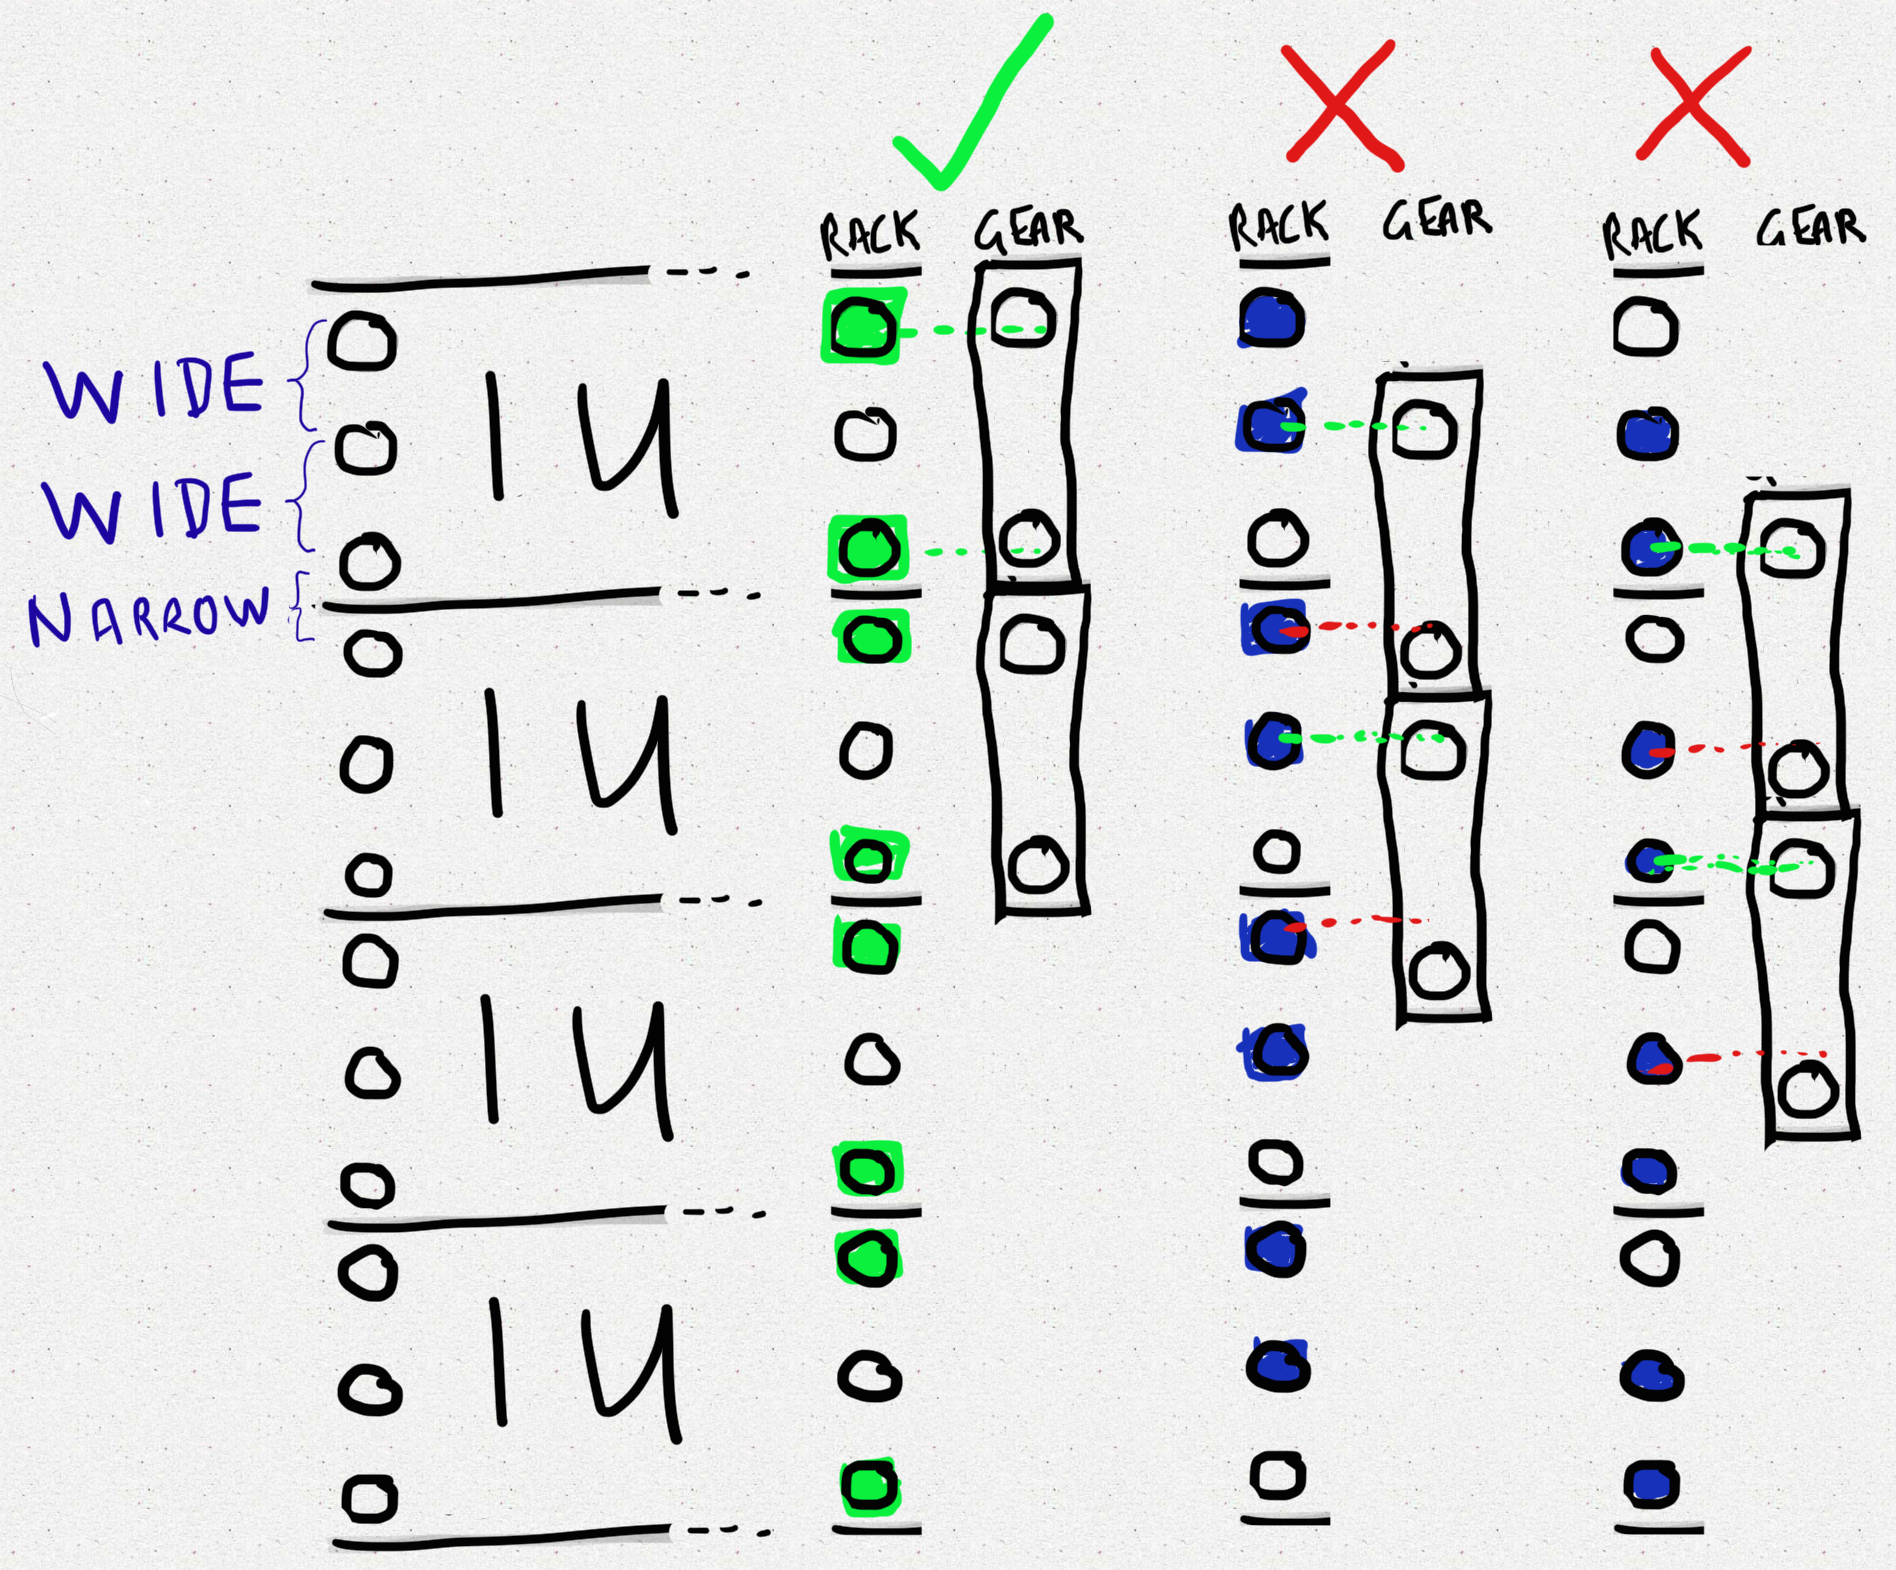
Start assembling the rack without thinking, and you’ll end up with only 1/3 chance of equipment fitting properly.
(I once had this happen to me with a 2m tall control system. Most of the racks were newer, and had dual-spacing holes, so we didn’t notice. It was only when I got to the last piece of equipment, which was older, that I realised we were off-by-one and had to tear it all out and start over again. Not fun, especially when you’re in a sweltering equipment room on site).
New racks have nice features like laser engraving, or painted/embossed markings to make it easy. But there’s certainly plenty of racks out there without that being visible. What to do in those situations?
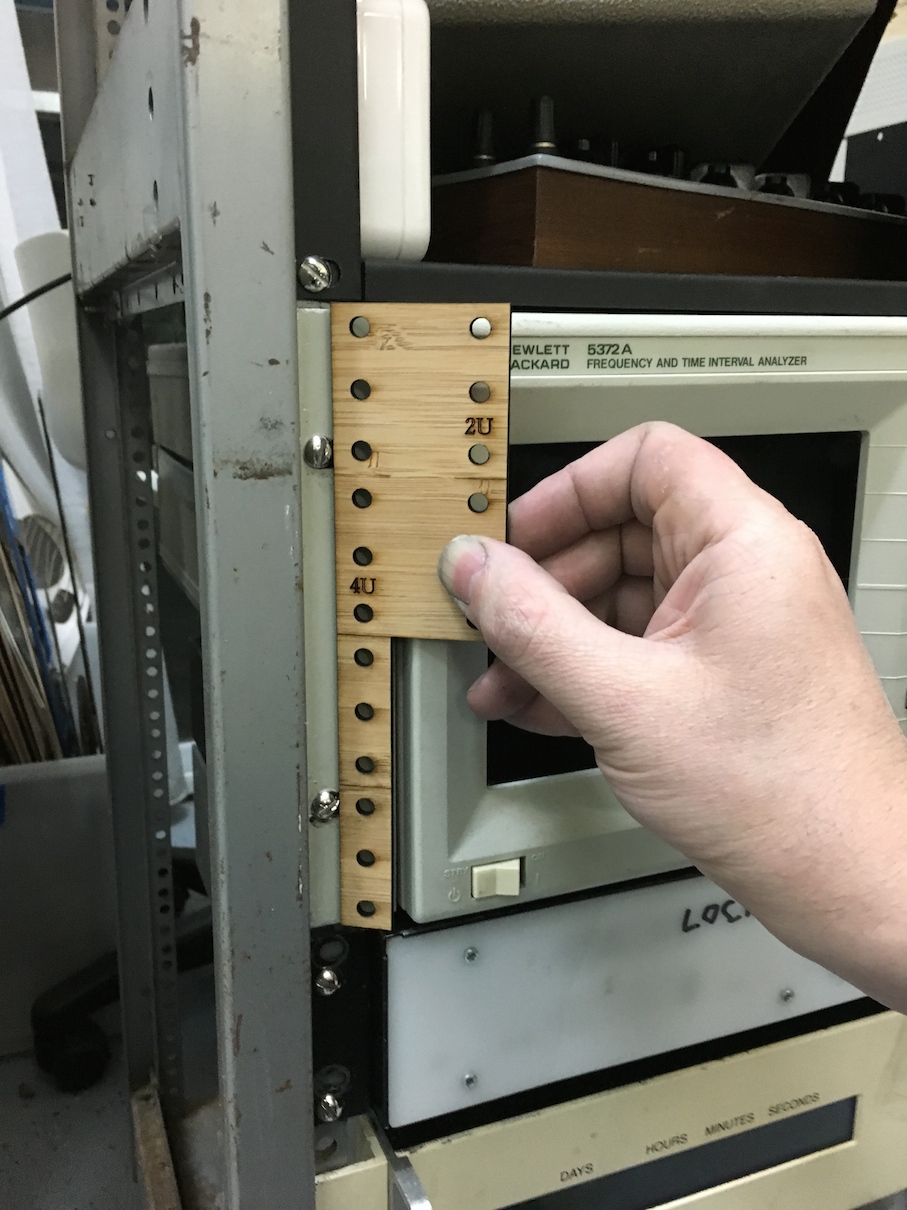
Here’s what I came up with, some quick templates I designed and lasercut in an hour or so. Here’s the first attempt;
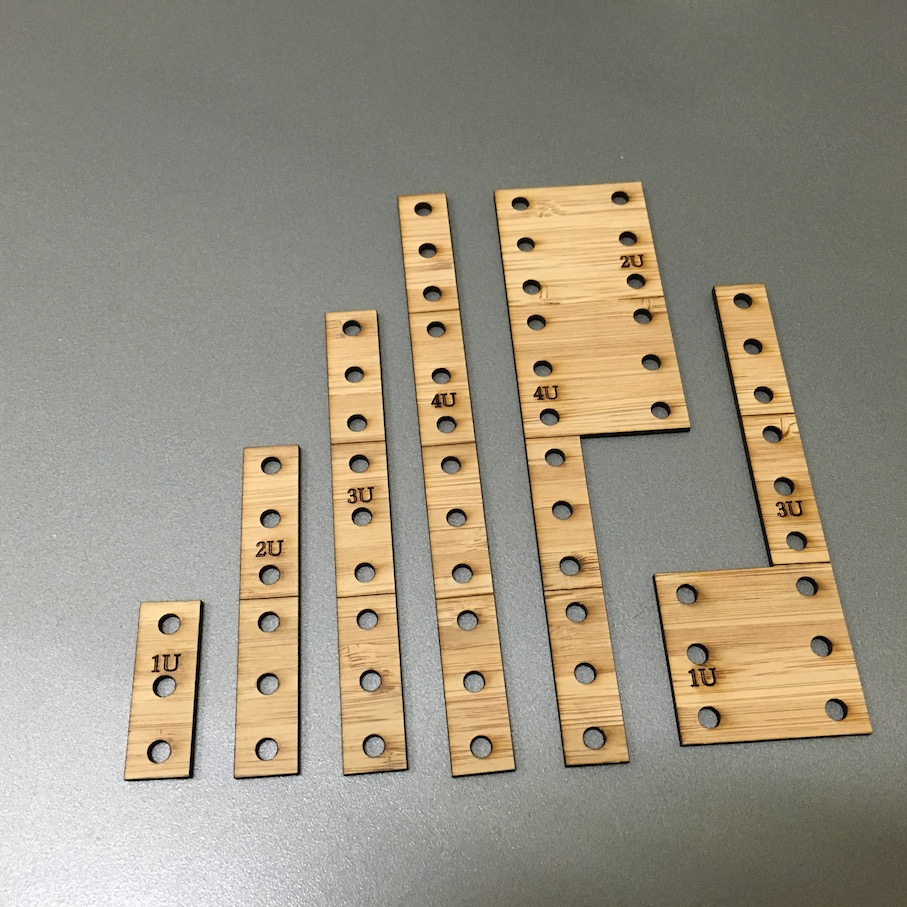
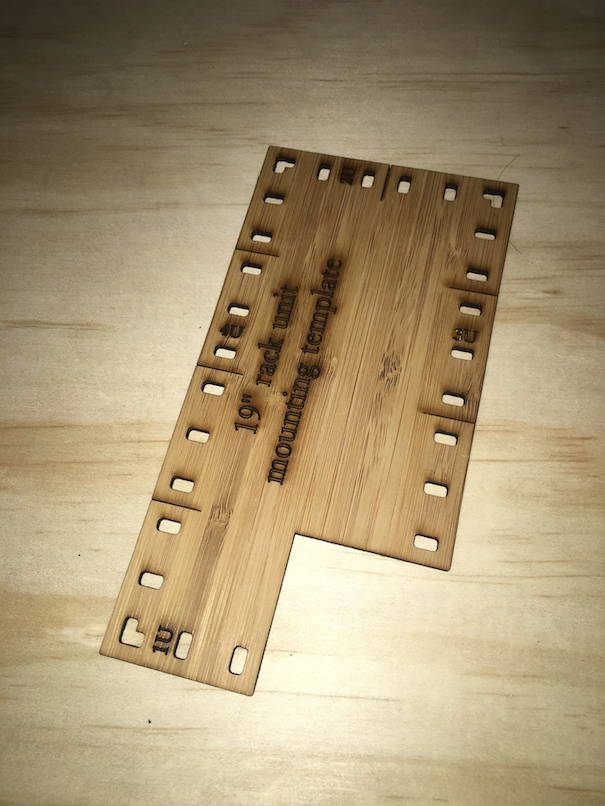
And the final version, which has 1U,2U,3U & 4U on the same piece, but can still get into corners to measure on the rack:
Here’s what they like in use:
The files are up here for anyone that wants to make their own:

Pingback: Repainting the rack | Tinkerings
Bitten by this a few times.
What is even worse is some slides or shelves where the front and back need to mount at different heights!
LikeLike
“What is even worse is some slides or shelves where the front and back need to mount at different heights!”
That’s just diabolical!
LikeLike