
I often find myself making wooden boxes for projects, and my favourite way is with plywood and batons, glued and nailgunned together. I usually make the left and right box sides with batons reinforcing, then the top, bottom, front and back are just flat pieces of wood. Once the two sides are made, you can glue the rest of the box together by hand on the table, without any need for clamps or alignment stuff:

One side panel of the box, batons glued to plywood
It’s brilliant for prototyping, since the nails are your ‘clamps’ while the glue is drying, and you can keep working on the box rather than having to put it aside for hours. Once the glue is dried, the boxes are rock solid.
(I first saw Adam Savage use this method on youtube, and I immediately went to the hardware store to buy a nail gun…).
One tricky thing with making a box like this, though, is holding the batons in place exactly a wall thickness from each edge. Clamping and keeping it aligned it is difficult, and I don’t like to nail the wood while it’s anything other than flat and level on the table.
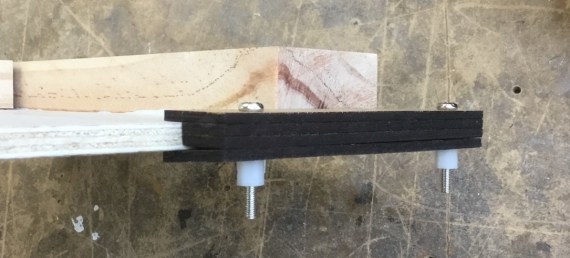
Here’s my solution. The “Cladding ruler”:

It’s made of four layers lasercut. The first three are glued, and the last is loose. I use M3 nuts and screws to loosely hold it in place:
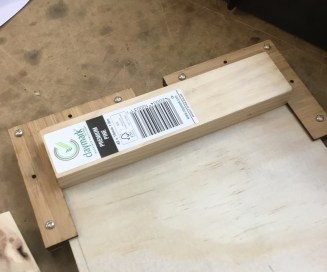
The baton has glue applied, and is inserted. The plywood can now be flipped over and nailgunned to hold it in place:
You can also use the jigs to put in the long sides of the panel:
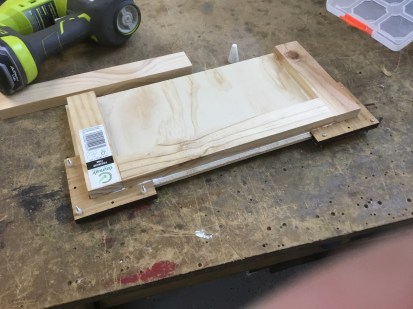
Ready to be flipped and the long side nailed in place
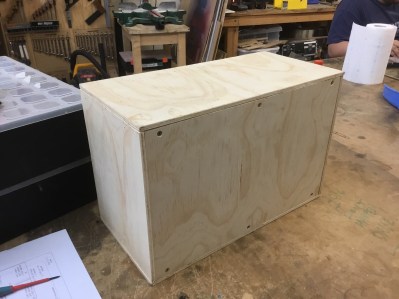
After gluing and nailing the left and right panels, and the rest of the box is ready to be assembled. It’s a super quick, after cutting the wood I had the box together in about half an hour, and even though the glue isn’t dry yet, the whole things is robust enough for me to keep working on cutouts and other stuff straight away.
Files here for anyone that wants to make their own:
https://www.thingiverse.com/thing:2747940

Pingback: Tangent Ruler – Draw circles passing through two points | Tinkerings