
Here’s the process for making the wire & bead Galton boards.
First up, cutting the wire to length. I screwed two wood screws right into the bench, then wrapped the wire back and forth till I had a bundle of 64.

Don’t cut the wire yet. Instead, wrap a length of copper around all the wires near one end. That’ll be the head of the display. Now all the wires are safely cinched at one end, you can cut them all at the other end. We now have 64 wires in a sort of ‘cat-of-nine-tails’ arrangement.
I used the same layout trick to make a bunch of little lengths to act as as the ties. A paint tin was about the right circumference. No idea how many I cut of these. Many?

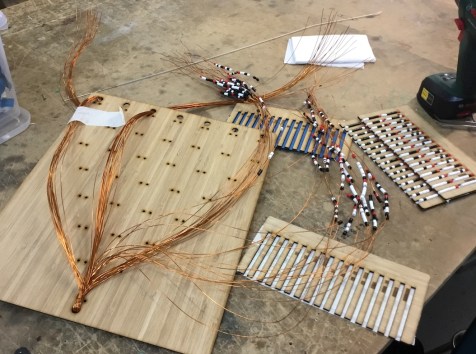
Then, I used the lasercut frames to hold the Perler beads in place while they were being threaded. A red bead is used to separate the two sections, and also as something to tie the copper off on at the end. 
Oh yeah, huge tip here I almost forgot to mention. Put masking tape on the bottom of the bead frame. That stops the beads from rolling away or getting knocked loose before you’ve finished threading them.
I think I decided it would be too fiddly to do all 64 at once, so I broke it up into groups of 16:
At this stage I questioned my sanity, and whether it was worth it. Thankfully I persevered. Deep breaths were needed.
Another useful trick was to tie off the first two steps of the sequence (i.e. groups of 16 in each) so that it would be easy to separate the loose strands later. Keeping 64 wires in any sort of left-to-right order on the table is pretty much impossible.
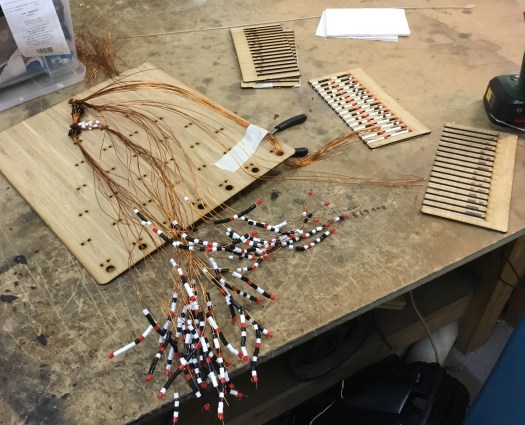
48 of 64 threaded, and a whole lot of wrangling left to go
One thing I remember having to do is use copper wire as temporary ties. Once I had the rough structure tied together it was easy to neaten it up later. Trying to get it all cinched up and neat the first time is way too hard.
Around now it’s finally it started to come together, and I can stand back and enjoy it:
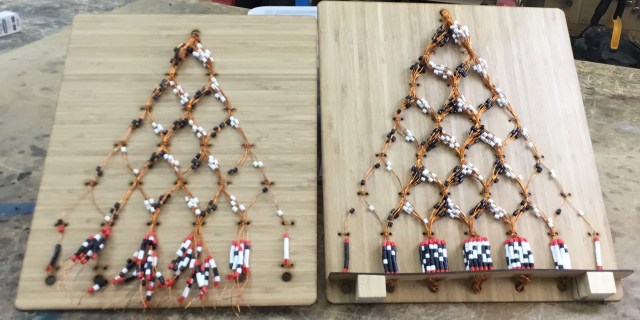
32 state almost finished, 64 state version completed
Although it still took a very solid evening’s work, (I seem to remember leaving the makerspace after midnight?) I’m happy with the technique now. If you’re interested in maths or stats art, I’d highly recommend making one for yourself, you won’t regret it.
Files are here for anyone that wants to make their own:
https://www.thingiverse.com/thing:3189020
Oh yeah. It has not escaped our notice that the specific method (rigid copper wire, cinched with same) immediately suggests a possible construction mechanism for making a freestanding sculpture without the need for a support board at all to stand in free space. Hmm…. I might revisit this in the future and see if I can make something nifty looking using that. If anyone else wants to try it in the meantime, I’d love to see how it goes. 😀
