
I spent a bit of time recently help a friend set up a robotics lab. One of the things I wanted to nail down was a consistent set of coordinate frames for all the equipment.
The Robot Operating System is awesome, and provided you set up your TF models correctly, it’ll do all the work for you. However it’s sometimes counterintuitive how it should be set up. ROS has a standard way of arranging coordinates (REP0103), but it’s different for ordinary coordinate frames and camera frames. (For very good historical reasons; the camera frame has Z pointing forwards, which means X is lined up with image columns, and Y is image rows).
I decided to make some tangible models for people to use when they’re discussing transformations. When troubleshooting robots you constantly find yourself in front of a whiteboard making “finger axes”, I wanted something we could use instead, and that had the same colouring and labels as the software.
The idea is first, to have something tangible to play with while brainstorming, and second, as a reminder of the convention, to allow errors to be detected. If there’s an error, I really want someone to ask “Wait, why is the green arrow pointing in a different direction on screen?”.
All the wood was laying around the makerspace, I found some 16mm dowel and a bunch of nice square pine sections. 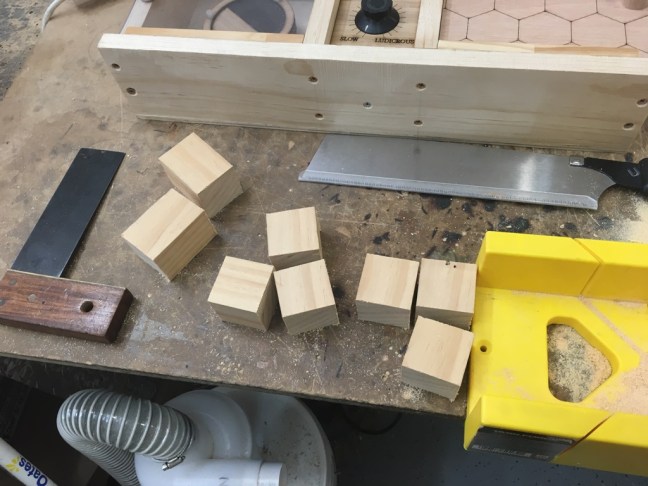
I used a spade bit to make the holes for the dowels. I much prefer Forstner bits, but we didn’t have a 16mm one. To get a consistent depth I used the drill stop, and had the vice to both hold it perpendicularly, and act as a handle in case the spade bit grabs and snatches the workpiece:

I spent a fair bit of time making an adjustable jig to cut the dowels repeatably, but apparently I didn’t take any photos of that bit.
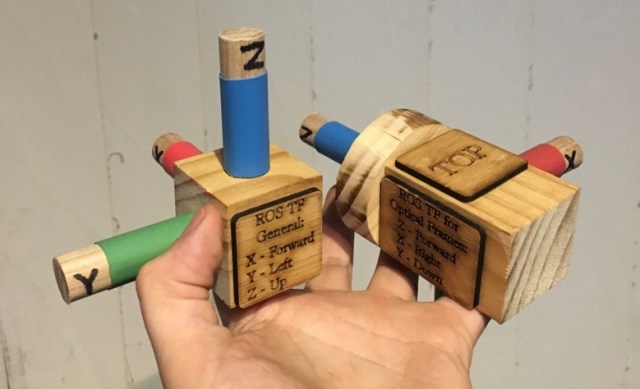
With the dowels glued in place, I added heatshrink to show the colours of the axes, and a lasercut label to show the orientation of the axes. The colours match those used by Rviz. (RGB is XYZ, respectively)
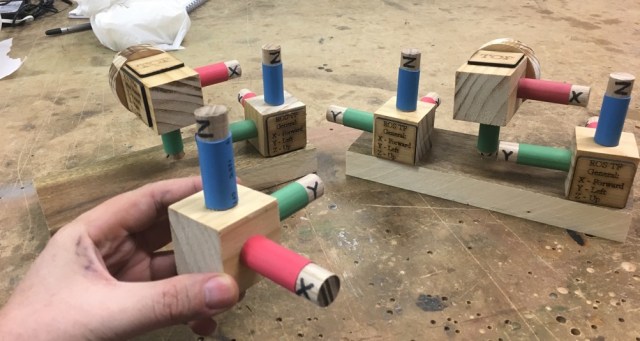 I made a pair of sets, one for me, one for my friend’s lab. Each set has an optical frame, and a pair of normal frames, plus a stand to hold them.
From behind. The circle is my attempt at making something ‘camera like’ quickly out of wood.

From the front
