Foam inlay for storing delicate parts

I have a whole bunch of glassware I’ve recently made and want to store safely. A standard way is to wrap each piece in cloth, but then it’s easy to forget what you have.

I cut some cardboard templates and made inserts for plastic tubs from foam. This worked well, but it’s time consuming to carefully slice each one.

Foam inserts

The lasercutter has a nifty trick where you can adjust the laser power to score an object but not cut all the way through. Using that, plus an ordinary cut on the foam made it extremely quick to make a lot of inserts.

If the glass piece is extremely delicate, I’ll put some cotton wool in there too, to stop it bumping around. Even with the wool the parts are a lot more visible than other methods I’ve seen around.

Files here:

http://www.thingiverse.com/thing:1239436


Posted in Uncategorized | Leave a comment

Sound level meter case

A quick lasercut case for a Jaycar (QM-1591) sound level meter. I didn’t want to carry it around in the plastic blister pack, and it’d get damaged without a hard case. 5 minutes in Inkscape, and a few more lasercutting and gluing, and I’ve got a robust and stackable solution.


IMG_1004

Files here:

http://www.thingiverse.com/thing:1239374


Posted in Uncategorized | Leave a comment

Lathe bit holder & Lathe trolley

Just a quick one, here’s a tool holder for a small set of lathe bits:

IMG_0772.jpg

The tools are each in a custom pocket

With spinning machinery there’s no substitute for proper training, but I thought this was useful so that when I come back after a few months.


Files are up here: http://www.thingiverse.com/thing:1158551

As always, I try to keep the equipment ready to go at short notice. The lathe has a dedicated tool trolley for all the bits and accessories. I also added an alley key holder and some lighting to the trolley to make it comfortable to use.

Lathe tool box_

The lathe chuck key also has a red ‘remove before flight’ ribbon tied to it.


Posted in Uncategorized | Leave a comment

Electron Microscope – Pt 2 The teardown begins!

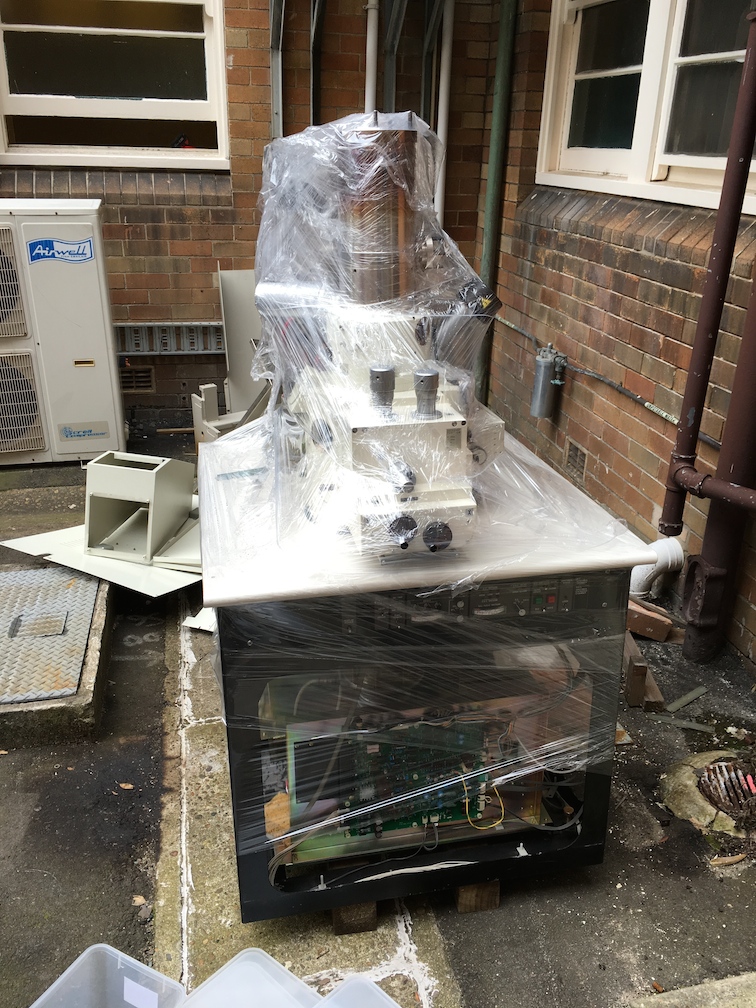
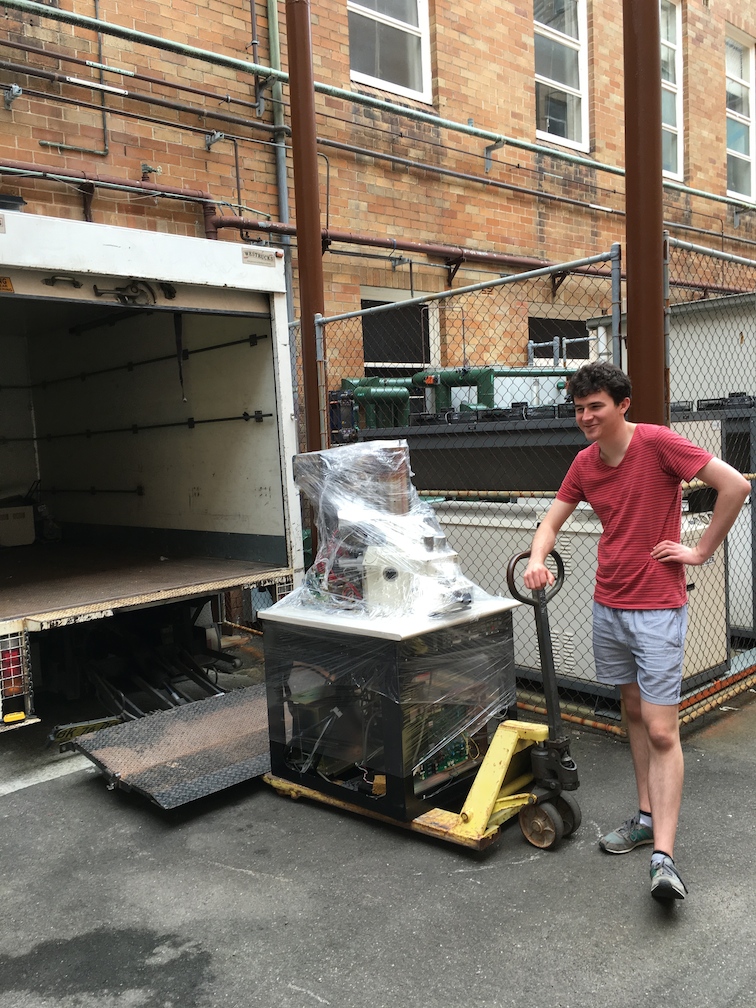
First challenge was getting the scope body unloaded and mobile. Unfortunately the casters were removed at some point, so getting the (546kg) frame up on to a pallet jack and out of the truck at the other end was non-trivial.

Scott and I spent about an hour working on it and eventually used a pair of crowbars and a series of wooden shims to bootstrap the frame up to a height the jack could get underneath.

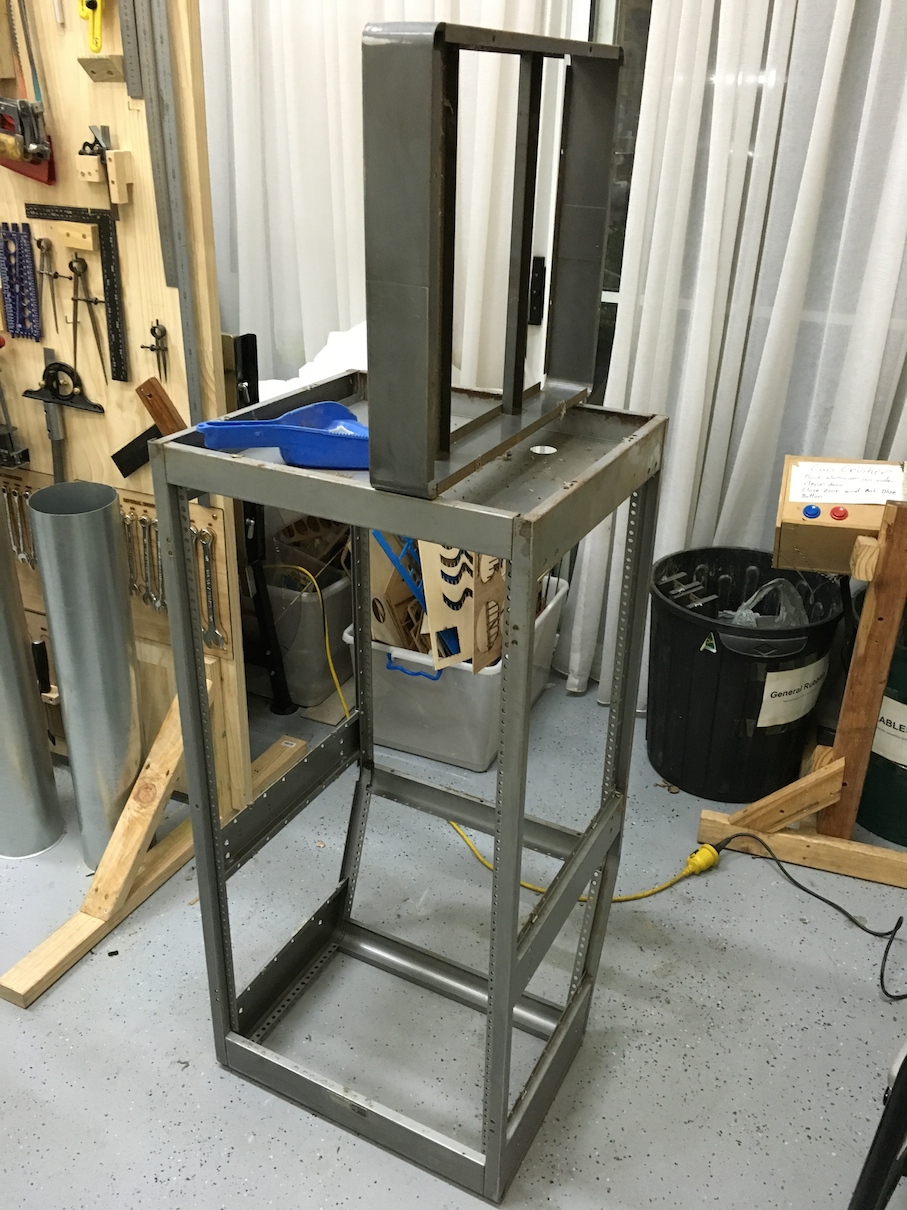
That got the microscope into the storage unit, but it was stuck in one position at that point. I later used some cheap moving trolleys from the hardware store underneath the frame to provide mobility. Getting the trolleys in place wasn’t easy either. It was easily an hour of playing with blocks of wood, the pallet jack as a lifting device, and the trolleys in various locations before i could put them down and take away the jack safely. If I’d had a crane it would have been done in 2 minutes, but sorting where you can lift while not getting in the way of where the trolleys were going in was an interesting challenge.

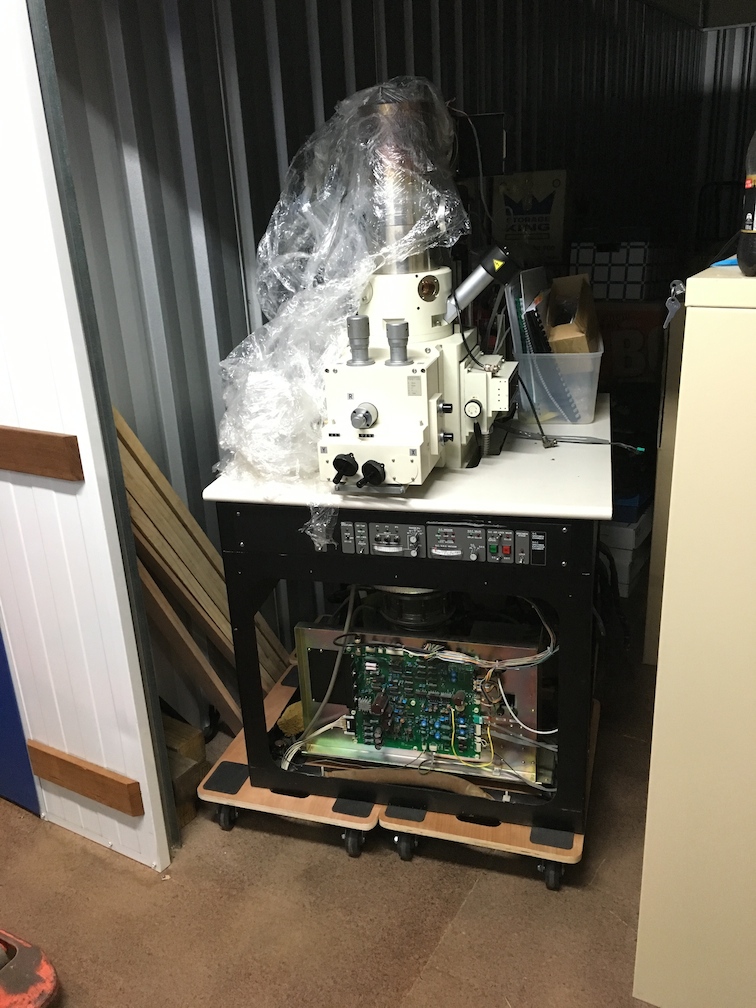
With all that done the base is now mobile which will make the restoration much easier:

Microscope in place

Microscope body after being loaded onto the trolley

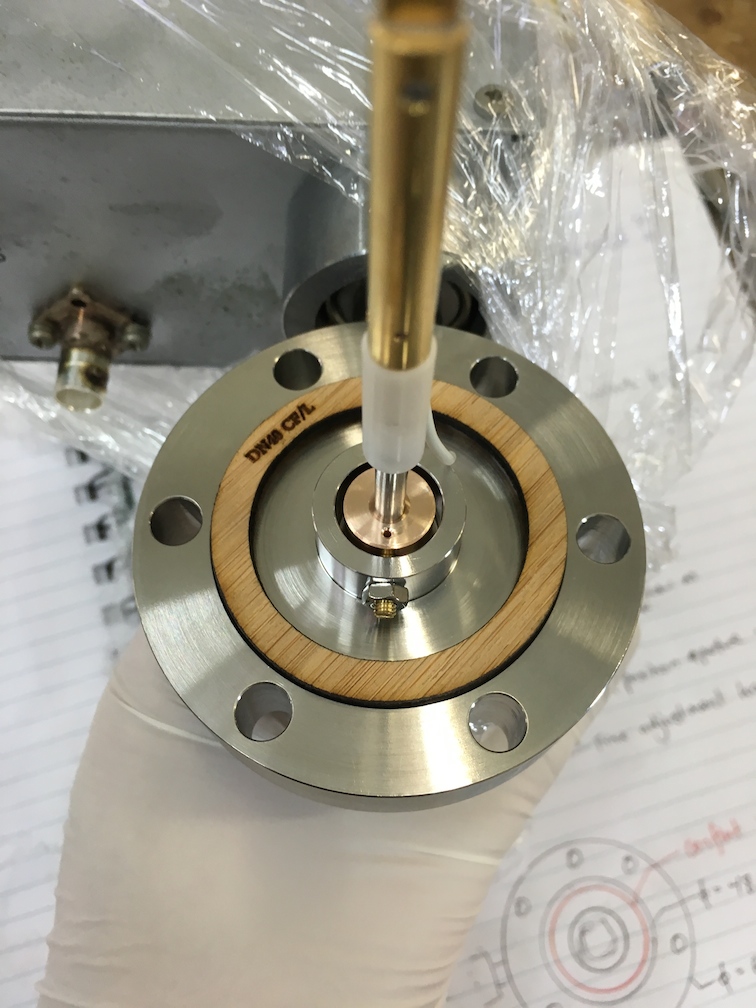
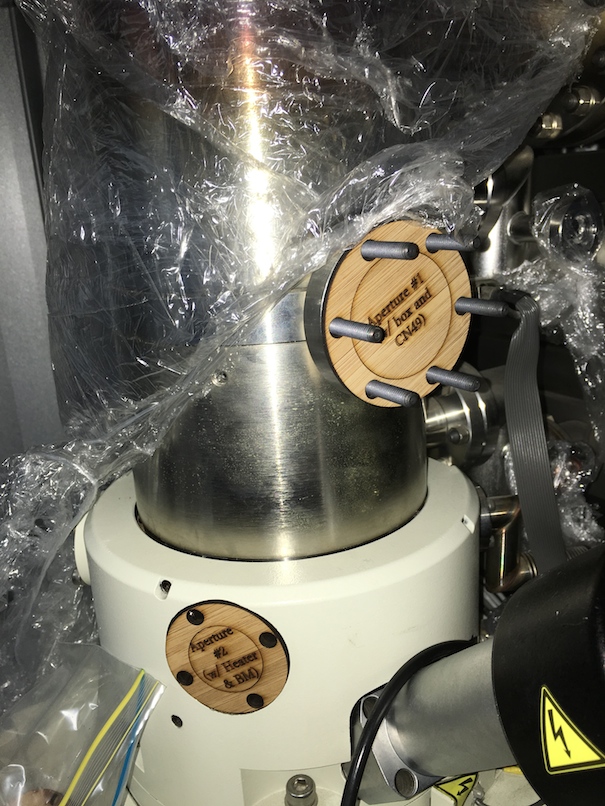
I started documenting all the accessories and detectors that I had, and making sure all parts of the vacuum system were accounted for:

Aperture for scanning electron microscope

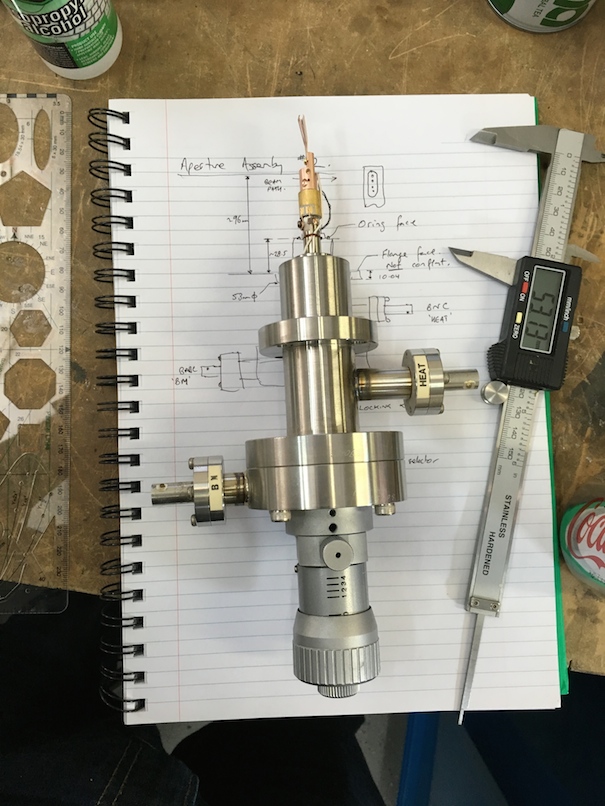
The adjustable aperture with beam current monitor and heater

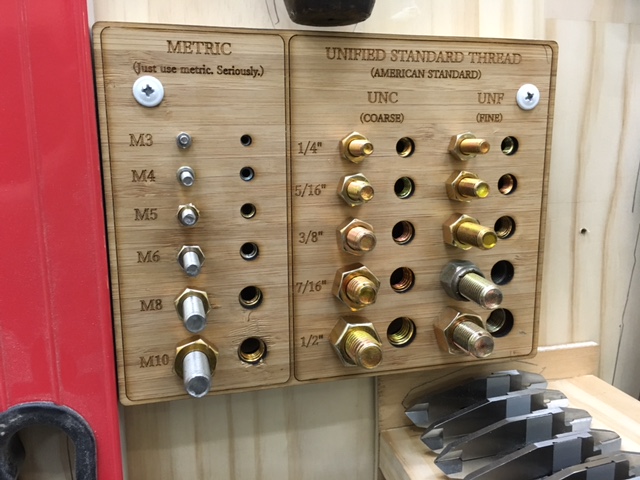
One irritating thing about vacuum engineering is that there’s several different standards for connections, as well as a host of manufacturer custom parts. If I’m going to recondition this system I need to ensure I have stock of all the right consumables (copper gaskets, o-rings, etc) and identifying them can sometimes be tricky.

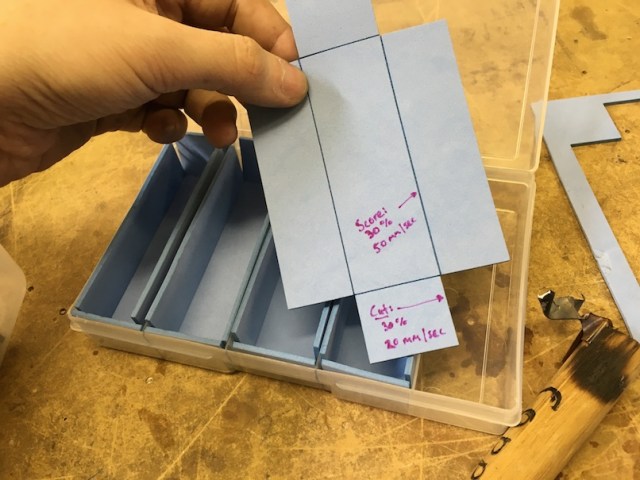
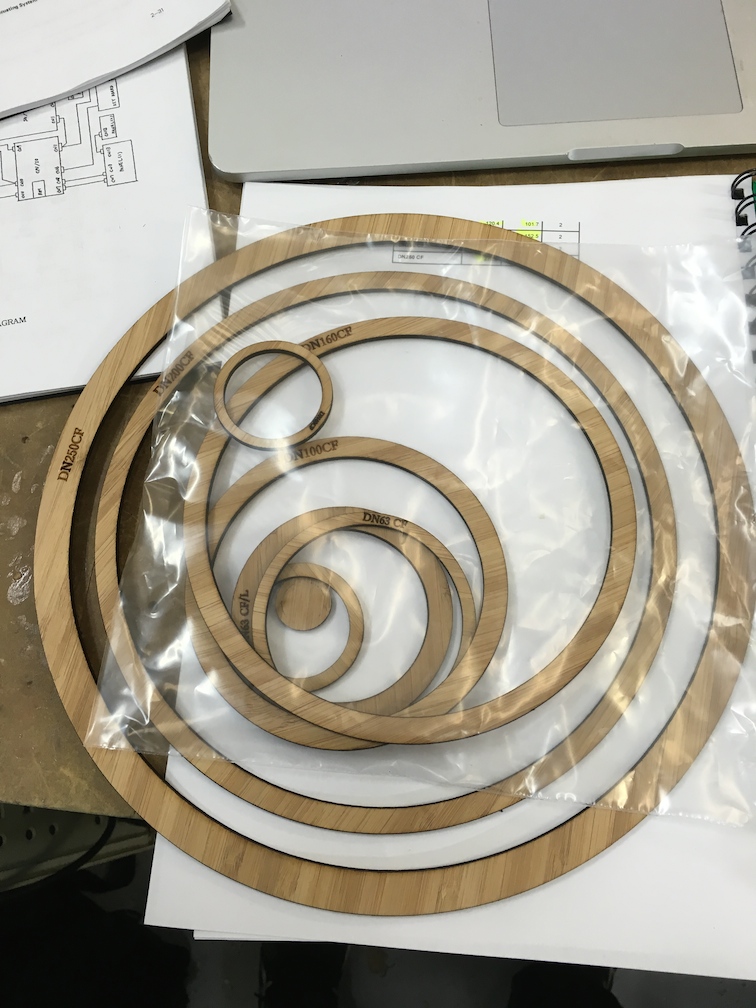
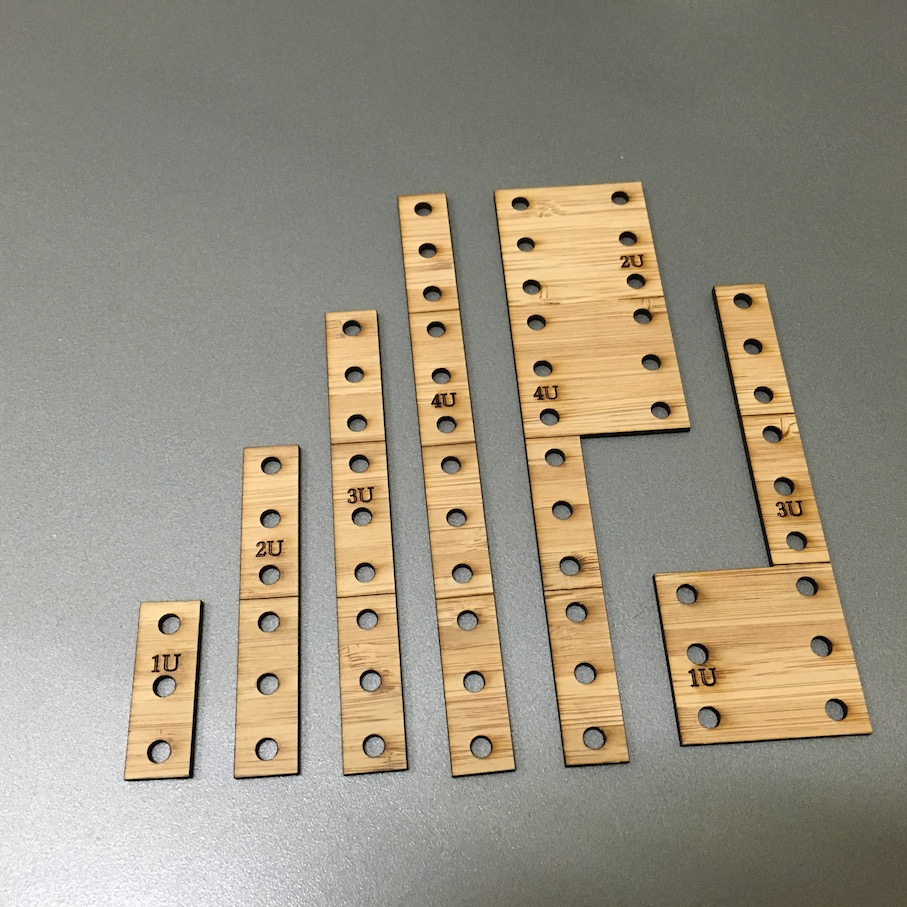
To aid with that I came up with a couple of tools. The first is for conflat flanges:

(Thingiverse link here: http://www.thingiverse.com/thing:1132406)

conflat flange sizing tool

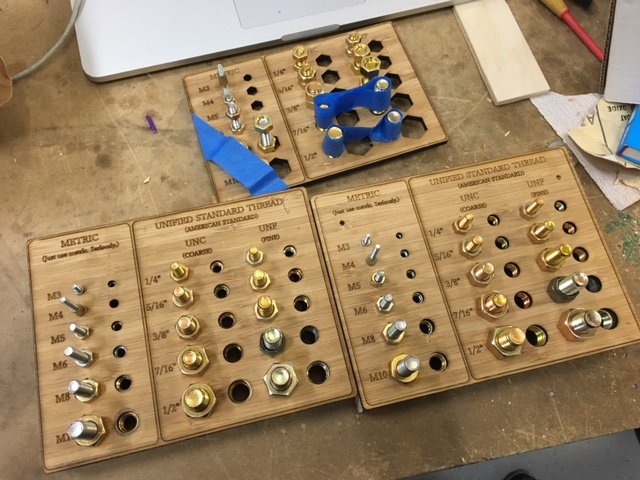
Conflat flange sizing tool

Conflat flange range

Full range of conflat templates

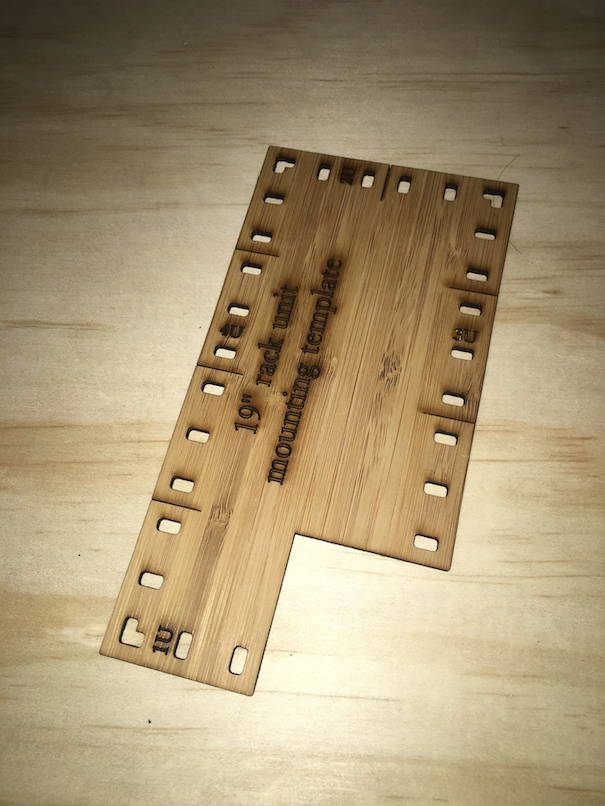
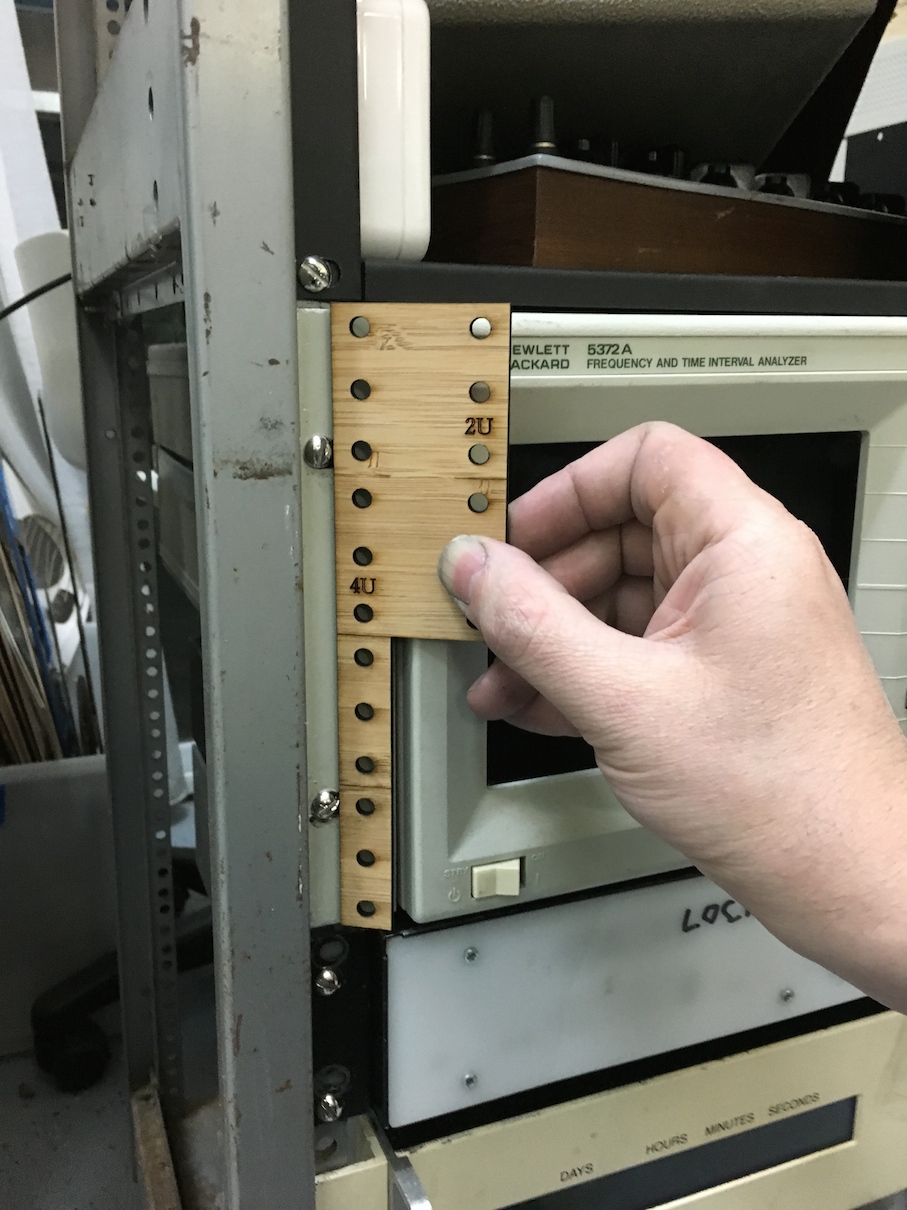
The second problem was ensuring that every connector in the system was spoken for. It’s embarrasingly easy to miss something or assume that two parts are the same thing, so I like using placeholders or labels to take the guesswork out of it.

I could just reinstall the actual parts, but I need new gaskets to do that properly, and I don’t want to risk things being damaged by installing them loosely in the meantime. Hence these ‘IOU’ plates for the detectors and apertures:

(Thingiverse link here: http://www.thingiverse.com/thing:1132393)

Custom blanking plates

I.O.U. one backscattered electron detector….

The vacuum system looks pretty good. That’s the main thing I was worried about, if stuff was damaged or dirty it’s very difficult or impossible to clean to UHV level again. I’m fine with rebuilding all the power supplies if need be, but I’m not quite up to machining all the pole pieces for a magnetic deflection system from scratch myself.

microscope oil diffusion vacuum pump

Microscope oil diffusion vacuum pump

Another godsend is that the primary pump for this microscope’s sample chamber is an oil diffusion pump, not a turbomolecular vane-type pump. Turbo pumps are awesome, but require incredibly precise engineering and control systems to stop them self destructing, and have very strict maintenance requirements, as well as some costly consumables like magnetic bearings.

Oil diffusion pumps on the other hand have no moving parts apart from oil, and will run reliably for years if properly interlocked. Also, I’ve previously reconditioned a diff pump for my other vacuum system, so I’m quite comfortable with what’s involved.

Oh, and we also scavenged the vacuum system from a Transmission Electron Microscope at the same time. Here’s us testing the pneumatic control valves:

Extra diff pump

Oil diffusion pump & pneumatic solenoids for valve and opening control

At this stage I’m thinking of converting the half-finished SEM I was working on previously into a large sputter coater for microscope samples. I could then use this pump to make a general high vacuum experiment station or something. Hmm..

Posted in Uncategorized | Tagged , | Leave a comment

In which I acquire a scanning electron microscope

I’ve been in the (slow) process of building my own Scanning Electron Microscope (S.E.M.) for a couple of years now. Apparently I got a reputation about microscopes that paid off bigtime this week.

One of the Unis had decomissioned a 20+ year old SEM and was in the process of getting rid of it. Multiple memebers from the BioFoundry group heard about it and forwarded the message on to me. Apparently quite a few people thought of me when they saw it, which is simply awesome 🙂

Here’s the main microscope body in the courtyard. Over half a ton of science sitting here:

Microscope in courtyard

Apparently they’d put out a call for interested facilities, but couldn’t find anyone suitable so it was disposed of. On the way the cables were cut, some detectors and accessories were removed and it was scrapped.

Within hours after confirming it was still there, I’d arranged a 3-ton moving truck with a hydraulic lift, and the services of Scott and Meow who kindly helped out with loads of heavy lifting at extremely short notice.

The only access was through a tunnel to the courtyard. To say the truck was a snug fit would be a bit of an understatement:

truck snug fit

The console desk rolled easily enough, but we had to use a pallet jack for the main SEM body:

Hitachi SEM

We ended up having to crane it into the truck, getting the pallet jack onto the hydraulic lift would have been too tricky. Craning the electron microscope

Not shown here are the console/control desk, ion pump controllers and other miscellaneous bits and pieces we picked up too.

Posted in Uncategorized | 1 Comment

Repainting the rack

For the rack I’ve been working on previously, I decided the rust and tarnish wasn’t acceptable and I should repaint it.

I know I could easily send it away and have it spraypainted (or even powder coated) professionally for not too much, but I’ve never sprayed metal before and I decided to use this as a learning exercise.

Here’s the steps involved I used. If I wanted to I could have done a lot more afterwards with cutting and polishing, but I was happy with the effect.

  • Clean the surface, remove all dust/cobwebs/dirt, etc
  • Wipe the surface with isopropyl alcohol.
  • Sand the metal with 80 grit sand paper, remove any trace of rust
  • Sand the metal with 180 grit sand paper, remove any trace of previous scratch marks, etc.
  • Sand the metal with 400 grit sand paper
  • Clean with isopropyl alcohol again (some people suggest priming the metal after this step, but my paint is an all-in-one and I decided to skip this)
  • Wet sand with 600 grit sand paper (wear latex gloves to stop oil from your hands)
  • Wet sand with 800 grit sand paper (wear latex gloves to stop oil from your hands)
  • apply paint per instructions, I used 2 coats separated by an hour, with little bits of touching up where needed.

Here’s what it looked like when I stripped it all down and started sanding:

sanding metal

The side panels being painted;

side panels being painted

The main frame being painted:

Main frame being painted

Painted and reassembled;

Main rack painted

Close up on the various colours. The finish isn’t perfect, but I’m pretty happy with it for a first go. The hammertone on the top and sides came out nicely too.

close up on the colours

And reassembled and powered up:

reconnected and powered up

I know what you’re thinking, and yes; This smart, elegant set of atomic clocks would be a tasteful addition to any living room.

All the sanding was pretty tiresome, but totally worth it. All up it was less than a week to go from getting the rack to having it re-painted and assembled in my house.

Posted in Uncategorized | Leave a comment

I hate cage nuts – (Or, how to avoid making mistakes with 19″ rack mounting)

As part of the rack I got the other day, I spent quite a while thinking of the best way to organise all my timekeeping stuff.

19″ racks are pretty cool, it’s a standardised way to mount equipment, and available more or less the world over. The only hitch is that the screws on the front contain a trap for people that aren’t paying attention. Here’s the catch, the hole spacing isn’t uniform. 

19 inch rack hole layout

There’s two sets of pitches for the holes, a wide 15.875mm (0.625″) and a narrow 12.7mm (0.5″). Each 1U has 3 holes separated by wide gaps, and the boundary between two units has narrow spacing. This makes sense, as it means a heavy 1U server is held up by screws closer to the edges (and hence more secure) than they’d otherwise be with uniform spacing.

The only downside is that you have to be very careful when you install the cage nuts & equipment, otherwise you’ll get halfway down the rack and realise the holes don’t line up.

Let’s take a simple example where we’re mounting cage nuts to suit a bunch of 1U servers with holes on the top and bottom. Here’s the possible outcomes:

19 inch rack mounting hole lineup probability

Start assembling the rack without thinking, and you’ll end up with only 1/3 chance of equipment fitting properly. 

(I once had this happen to me with a 2m tall control system. Most of the racks were newer, and had dual-spacing holes, so we didn’t notice.  It was only when I got to the last piece of equipment, which was older, that I realised we were off-by-one and had to tear it all out and start over again. Not fun, especially when you’re in a sweltering equipment room on site).

New racks have nice features like laser engraving, or painted/embossed markings to make it easy. But there’s certainly plenty of racks out there without that being visible. What to do in those situations?

Here’s what I came up with, some quick templates I designed and lasercut in an hour or so. Here’s the first attempt;

Laser cut 19 inch rack templates

And the final version, which has 1U,2U,3U & 4U on the same piece, but can still get into corners to measure on the rack:

19 inch rack template final

Here’s what they like in use:

rack mount template in use

The files are up here for anyone that wants to make their own:

http://www.thingiverse.com/thing:1074943

Posted in Uncategorized | 3 Comments

Getting another 2 atomic clocks, plus some other goodies

I spent the evening having a chat and look at old equipment for sale at the ARNSW clubhouse:

http://www.arnsw.org.au/html/page_disposals.html

I was only after one bit of equipment, but I went a bit googly eyed and couldn’t resist getting some other cheap bits while I was there.

We have:

  • Spiffy antique rack case
  • HP 5372A frequency/ time interval counter (The only thing I was actually planning on buying)
  • Three GPS disciplined oscillators
  • HP GPIB programmable 50V/2A power supply
  • Two rubidium atomic clock units (already passed one on to a friend)
  • Old style display unit (predates 7-segments) that has individual bulbs and projectors per digit per number
  • decade resistance box
  • milk crate full of blank copper clad PCB material for making circuit boards

Not bad for an evening’s work. Now to paint and clean up the rack a bit…

Rack full of various equipment

Posted in Uncategorized | 4 Comments

Bolt & screw tester set for the wall

I wanted a way for people at Robots and Dinosaurs to quickly figure out what fasteners were what, without having to go to the trouble of using thread gauges or calipers.

Wall mount bolt sizers aren’t exactly new, of course, but the cheapest ones I could find online were >$100 delivered. After a couple of hours of measuring and lasering I had this knocked up and installed at the space.

Bolt and screw sizer

The fasteners weren’t exactly cheap, but buying a small packet of each allowed me to make a few sets at once:

3 sets under construction

One for home, one for the space, and one for a friend.

Files are up on Thingiverse if anyone’s interested: http://www.thingiverse.com/thing:1037990

After going through all the different types of screws, it got me thinking. I remember a couple of times going through the junk bin to find a match, and getting one where one bolt size was just close enough to another that it’d go in a turn or so before jamming. How often does this occur?

I drew up this graph to help visualise it. Two different bolts types only have a ‘collision’ if not only the diameter is close, but also the pitch (distance the bolt travels per revolution) as well. So it’s really a 2 dimensional issue:

Screw pitch vs diameter

Blue is the standard metric range, and purple is the special metric ‘fine’ (which is rare to the point of being almost unheard of). The other two are UNC (coarse) and UNF (fine), the two most popular US standards.

Judging by the graph, I’m going to guess the pair I had issues with previously were M10 and 3/8″ coarse.  Nifty!

Posted in Uncategorized | Leave a comment

Workbench tool organiser

I’m becoming a huge evangalist for Adam Savage’s ‘First order retrievability’ concept, and I’m slowly applying it to wider areas in my space. Here’s the latest round, a caddy to hold all my jewellers screwdrivers (including torx!), tweezers, knifes, pearl catch, centre punch, scribes, hooks, tiny files, pliers, pens, pencils, markers, rulers, vernier calipers, and a few other bits and pieces.

Having everything laid out like this means that:

  • You don’t forget that you’ve got a tool. Might sound silly, but there’s been a number of times where I’ve bought a duplicate of a tool or part just because I forgot I had one already.
    • A related problem is forgetting a type of tool exists. See the silver rods with the black tips at the back left? They’re a nifty wrench specifically for getting into things like camera lenses and watch cases. Beautiful tool, makes life easy. But if I put it in a drawer, after a few months I’d probably forget about it, and if I came to open a watch would reach for pliers first without thinking.
  • You can reach it straight away, without having to unpack other stuff. Don’t have to break the ‘flow’ in the middle of a tinkering session to go find where your torx screwdrivers are.
  • It invites easy cleanup. The tool’s ‘home’ is right there, takes no emotional energy to put it back when you’re finished. Compare that to fetching a storage box and putting it back on the shelf. Also means you’re less prone to leave loads of stuff out because you might need it ‘soonish’.
  • It takes less emotional energy to start a project. I know that I can sit down at the bench and just start tinkering. If I had to go grab things from shelves before starting, it’d be another excuse to sit on the couch instead. And we’ve all got too many of those in our lives.

tool holders

Files up here; http://www.thingiverse.com/thing:1034281

Posted in Uncategorized | 2 Comments